Introduction
The world is running online, so why not an automotive business? Bringing your automobile business is a must in today’s digital world. Whether you're a car dealer, a car enthusiast, or someone looking to sell vehicles independently, a professional website can help you reach more customers, build credibility, and grow your business.
Creating your own car website may sound technical or time-consuming, but it’s easier than ever thanks to user-friendly tools and platforms. With the right steps, you can launch a website that showcases your inventory, attracts buyers, and sets you apart from the competition.
In this step-by-step guide, we’ll walk you through everything you need to know to create your own car website, from choosing a domain name to setting up listings, optimising for SEO, and launching your site successfully.
Why should you create your own Car Website?
Creating your own car website offers a multitude of compelling advantages, especially in today's digital age. Here's a breakdown of the key reasons why you should consider building your online presence for your automotive endeavours:
1. Wider reach and increased visibility
A website breaks down geographical barriers. You can reach potential buyers far beyond your local area, expanding your market significantly. This helps in generating more inquiries and sales.
2. 24/7 Availability
Your virtual showroom is open around the clock, allowing potential customers to browse your inventory and gather information at their convenience, even outside of your physical business hours.
3. Generate leads and customer inquiries.
Integrate contact forms, call-to-action buttons, and lead capture mechanisms to gather information from interested buyers. This helps in bringing and maintaining the potential leads.
4. Build Brand Identity and Credibility
A professional-looking website enhances your brand image and establishes credibility with potential customers. It shows that you are serious and invested in your business.
5. Cost-Effective Marketing
Compared to traditional advertising methods, having a website and implementing online marketing strategies can be a more cost-effective way to reach a large and relevant audience.
6. Track Performance and Insights
Website analytics tools allow you to track visitor behaviour, identify popular vehicles, and understand the effectiveness of your marketing efforts. This data helps you make informed business decisions.
A Detailed Guide on How to Create Your Own Car Website
We have made a complete guide including every step to help you create your own car website with ease.
Step 1: Plan Your Purpose
Are you trying to sell cars, provide information, build a community, or something else? This must be the first question when planning for a car website. Once you have decided this, move ahead with knowing your target audience, influencing their interests, and how to feature products should be next.
Make sure you are doing a complete research before getting into the website design process. Also, listing out the features, car models, and everything should be pre-planned. If you are just a beginner wanting to get your car business online, all these things should be done right.
Step 2: Buy a Domain and Web Hosting

The next step asks to follow up with getting a domain and the web hosting plan once you have decided on the purpose.
As a beginner, you must know that a domain is the unique addressing element for your website. The domain name starts with “www” followed by your company name and ends with “.com”, “.co” and “.in”. Just know that a domain is like the address through which users can easily locate your website on the browser. With this, users can easily find you on the web.
And now talking about the web host, this is the actual home of your website, where all the confidential files and folders are saved. A web hosting service allocates your website a secure server space to your website. This is where your website can gain performance, space, and security on the web. But that needs to get a perfect web host. While choosing the right web host, you must consider factors like reliability, storage, speed, security features, and pricing.
Surprisingly, some trusted web hosting platforms come along with providing domain names for free. Interesting! Isn’t it? So, it becomes a valuable purchase when you get a domain name and the web host in one go. Bluehost hosting provides one of them, giving you a free domain name with every web hosting plan.
For this guide, we will be going with the Bluehost web hosting platform to discover the best plan that suits creating your car website.
Now, you need to get an appropriate plan from the Bluehost official website and tap the Get Started button. With this, you will reach the pricing page where you will find multiple plans for your website.
Among all the pricing plans, the basic and choice plus plans are the most recommended ones. Once you have decided on the plan, simply hit the Select button under the plan, and this will take you to choose the domain name. Here, you can choose the domain for your business and tap the Next button to move ahead.
The next page is where you need to enter your account and payment details to complete the purchase.
Step 3: Install WordPress

The next step to create your own car website is to install WordPress.
Once you are done with purchasing the Bluehost hosting service, you will receive a confirmation email with details to log in to your WordPress dashboard.
Also, you will get a login link through which you can simply install WordPress with a single click. This is the simplest way to install WordPress, specially made for non-techy users.
In another way, you simply need to log in to your Bluehost account and head to the Websites section. From here, tap the “Edit Site” button to reach the WordPress Website dashboard.
Step 4: Choose a WordPress Theme

When you have reached your blank WordPress Website, you will see a blank website with no content. This is the time you can make it yours by adding a perfect Car Dealer WordPress Theme to it.
Finding the best car dealer WordPress theme is indeed a very viable and often optimal solution for creating a professional and feature-rich website for your car dealership. It balances industry-specific functionality, customisation, cost-effectiveness, and ease of use.
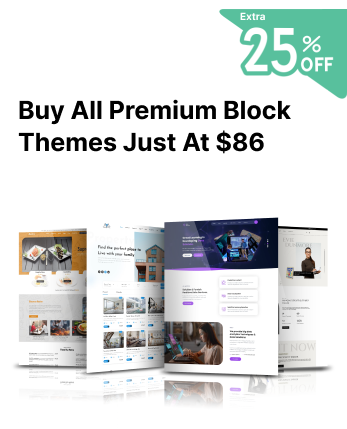
The Car Dealer WordPress Theme is a premium, niche-specific theme designed especially for automotive businesses like car dealerships, vehicle classifieds, auto repair shops, and car listing platforms. It’s known for its comprehensive features, professional design, and flexibility, making it one of the most popular choices for building a fully functional car dealer website without custom development.
The Car Dealer WordPress Theme is a powerful, time-saving solution for car dealership websites. It combines tailored features with a clean design and professional tools to showcase vehicles, drive inquiries, and close sales. Whether you’re a solo dealer or launching a multi-vendor auto platform, this theme gives you a rock-solid foundation without starting from scratch.
Now let’s start knowing how to install this powerful Car Dealer WordPress Theme to create your own car website.
First, you need to rush to the WordPress dashboard and tap the Themes option under the Appearance tab.
Under the Themes option, hit the Add New option, and you will reach a new window. Here, you can either upload a new zip file theme or simply search from the WordPress Theme library.
As you are a beginner, you can go to the search button and search for the Car Dealer WordPress. Once you have found it, tap the Install and then the Activate button.
Step 5: Customising the Car Dealer WordPress Theme
Once your theme is activated, the real work of making it yours begins. Most premium car dealer themes come with their own dedicated "Theme Options" or "Theme Settings" panel. This is usually found in the WordPress admin sidebar.
- General Settings: Logo upload, favicon, contact information, social media links, copyright text.
- Layout Options: Choosing different layouts for your homepage, vehicle listings, single vehicle pages, blog, etc.
- Styling Options: Select colour schemes, fonts, background images, and other visual elements to match your brand.
- Inventory Settings: Configuring how your vehicle listings are displayed, search filters, sorting options, and potential integration with DMS.
- Homepage Settings: Arranging different sections on your homepage (e.g., featured vehicles, testimonials, calls to action).
- Blog Settings: Customise the appearance of your blog posts and archive pages.
- Footer Settings: Editing the content and layout of your website's footer.
- Well, there is also a live Customiser that helps in creating live changes and preview settings. It often overlaps with theme options but offers a more visual way to customise certain aspects. These customizing sections include:
- Site Identity: It lets you upload the website logo and set the title and tagline.
- Colours: Choosing your primary and accent colours.
- Fonts: Choosing multiple typographies for headings and text.
- Header: It lets you customise the header, menu display and add widgets.
- Footer: Editing footer widgets and layout.
- Menus (Appearance > Menus): Creating and managing your website's navigation menus. You'll need to assign these menus to specific locations within your theme (e.g., primary menu, footer menu).
- Widgets (Appearance > Widgets): Adding and arranging content blocks (widgets) in designated widget areas (sidebars, footer, etc.). Car dealer themes often have custom widgets for vehicle search, featured listings, and more.
- Homepage Settings: Configuring what is displayed on your homepage (latest posts or a static page). If your theme has a specific homepage layout, you'll often set a static page here and then customise its content using the theme options or page builder.
Step 6: Create Website Pages
Building website pages while creating your own car website is a fundamental step in setting up your online presence. Here’s how you can make it happen.
Before you start creating pages, it's crucial to plan which pages your website will need. Here are some essential pages for a car dealership website: Homepage. Inventory pages, vehicle detail pages, About us, Contact us, Services, testimonials/reviews, Blogs, privacy policy, and terms of service.
To create a page on your car-dealing website, you simply need to reach the WordPress dashboard first.
Tap on the “Pages” option and then choose the Add New option under it.
At the top of the editor, you'll see a field to "Add a title." Enter the name of your page as Homepage, Inventory, or the contact page.
Use the WordPress block editor (Gutenberg) or your theme's page builder (if it has one) to add content to your page. This contains various elements like text, images, videos, forms and more. Click the "+" icon to add different blocks like paragraphs, headings, images, galleries, lists, buttons, etc.
In the right-hand sidebar, under the "Featured Image" tab, you can upload an image that represents the page. This is often used for social sharing or in theme-specific layouts.
Once you are done putting all the stuff, just hit the “Publish” button to make your page live.
Step 7: Add Necessary Plugins
Okay, let's talk about the essential WordPress plugins you should consider installing for your car dealership website. Plugins are the core enhancing elements that boost the entire functionality of your website. Here are some of the most important plugins you must install while creating your car website:
- WP Auto Listings: A popular free plugin specifically designed for car dealerships. It offers features for managing vehicle inventory, creating searchable listings, and lead generation forms. It's often compatible with many car dealer themes.
- Car Listings by MotoPress: Another well-regarded option with features for inventory management, advanced search filters, loan calculators, and comparison tools. They often have both free and premium versions.
- WPForms: A user-friendly plugin with a drag-and-drop interface
- Yoast SEO: One of the most popular SEO plugins, offering features for optimising content, managing meta descriptions and keywords, generating XML sitemaps, and more.
- WP Rocket: It is the premium plugin that helps in easing website usage and robust caching.
- LiteSpeed Cache: A free plugin that works best with LiteSpeed servers but offers good caching capabilities.
- Wordfence Security: A popular plugin offering firewall protection, malware scanning, and login security features.
- Smush: A popular free plugin for compressing and optimising images.
- Imagify: A freemium plugin offering excellent image compression with different levels.
- Social Warfare: It is a plugin with intuitive social sharing buttons and analytics.
Now that you have all the vital plugins for the car website, you must know how to install them.
This is the prior step that you must reach the WordPress dashboard and under the Plugins tab, hit the Add New button.
On the new window, you will see the entire WordPress plugin library. Here, you need to search for the desired plugin, for example, WP Auto Listings.
Once you find it, hit the Install and then the Activate option. You will see the plugin has been presented on your website under the plugins section.
By following a similar process, you can install every single plugin on your website.
Step 8: Add Car Listings
After installing and activating your chosen car inventory plugin (e.g., "WP Auto Listings," "Car Listings"), you'll see a new menu item in your WordPress admin sidebar with the plugin's name. Click on it.
Within the plugin's interface, look for an option to add a new vehicle listing. This might be a button or a submenu item.
After this, you'll be presented with a form containing various fields to describe the vehicle. These details include title, description, price, mileage, year, model, features, images and more.
The plugin will provide options for uploading multiple images for each vehicle.
Once you've entered all the information, click the "Publish" or "Save Vehicle" button provided by the plugin.
Step 9: Launch and Promote your Car Website
Alright, you've created your own car-dealing WordPress website set up with your inventory listed – fantastic! Now comes the crucial part: launching it effectively and promoting it to reach potential customers.
Before you make your website public, ensure everything is polished and ready for visitors:
Double-check all text, vehicle descriptions, specifications, and contact information for accuracy and clarity.
Make sure all the website images are of perfect quality and well optimised for the web.
Thoroughly test your website on various mobile devices to ensure it looks and functions flawlessly.
You must keep a thorough test of your website on all browsers for proper performance.
Test all forms, search filters, links, and any interactive elements to ensure they work correctly.
Check that all the security plugins are working well and properly configured.
Perform a final full website backup before launching.
Also, you must keep the Privacy Policy and terms of service pages linked at the footer and in the proper place.
Ensure the sitemap is properly submitted to the Google Search Console for indexing of your website.
Once you're confident with the pre-launch checklist, make your website publicly accessible. Announce the launch on all your dealership's social media platforms.
Now, to promote it well, you must do:
Announce the launch on all your dealership's social media platforms.
Share high-quality photos and videos of your vehicles, highlight special offers, run contests, and engage with your local audience.
You must guide your visitors to subscribe to website newsletters by giving valuable content.
Conclusion
Creating your own car-dealing WordPress website doesn’t have to be overwhelming, especially when broken down into a clear, step-by-step process. From selecting the right Car Dealer WordPress Theme to customising it with essential features, and finally promoting your site online, each stage plays a vital role in setting your dealership up for digital success.
We've journeyed from laying the foundation by choosing the right platform, with a strong recommendation for the flexibility and automotive-specific features of WordPress and dedicated car dealer themes, to the crucial steps of installation and initial customisation. You've learned how to populate your digital showroom with detailed car listings, ensuring you provide the vital information Nagpur customers need, from mileage and features to those all-important high-quality images.
Furthermore, we've explored the essential plugins that can supercharge your website's functionality, enhancing everything from inventory management and lead generation to SEO and security. Finally, we've charted a course for launching and promoting your website, emphasising the importance of local SEO strategies, engaging social media, and leveraging both online and offline efforts to reach the car-buying audience.